This is a test post!


This is a test post!
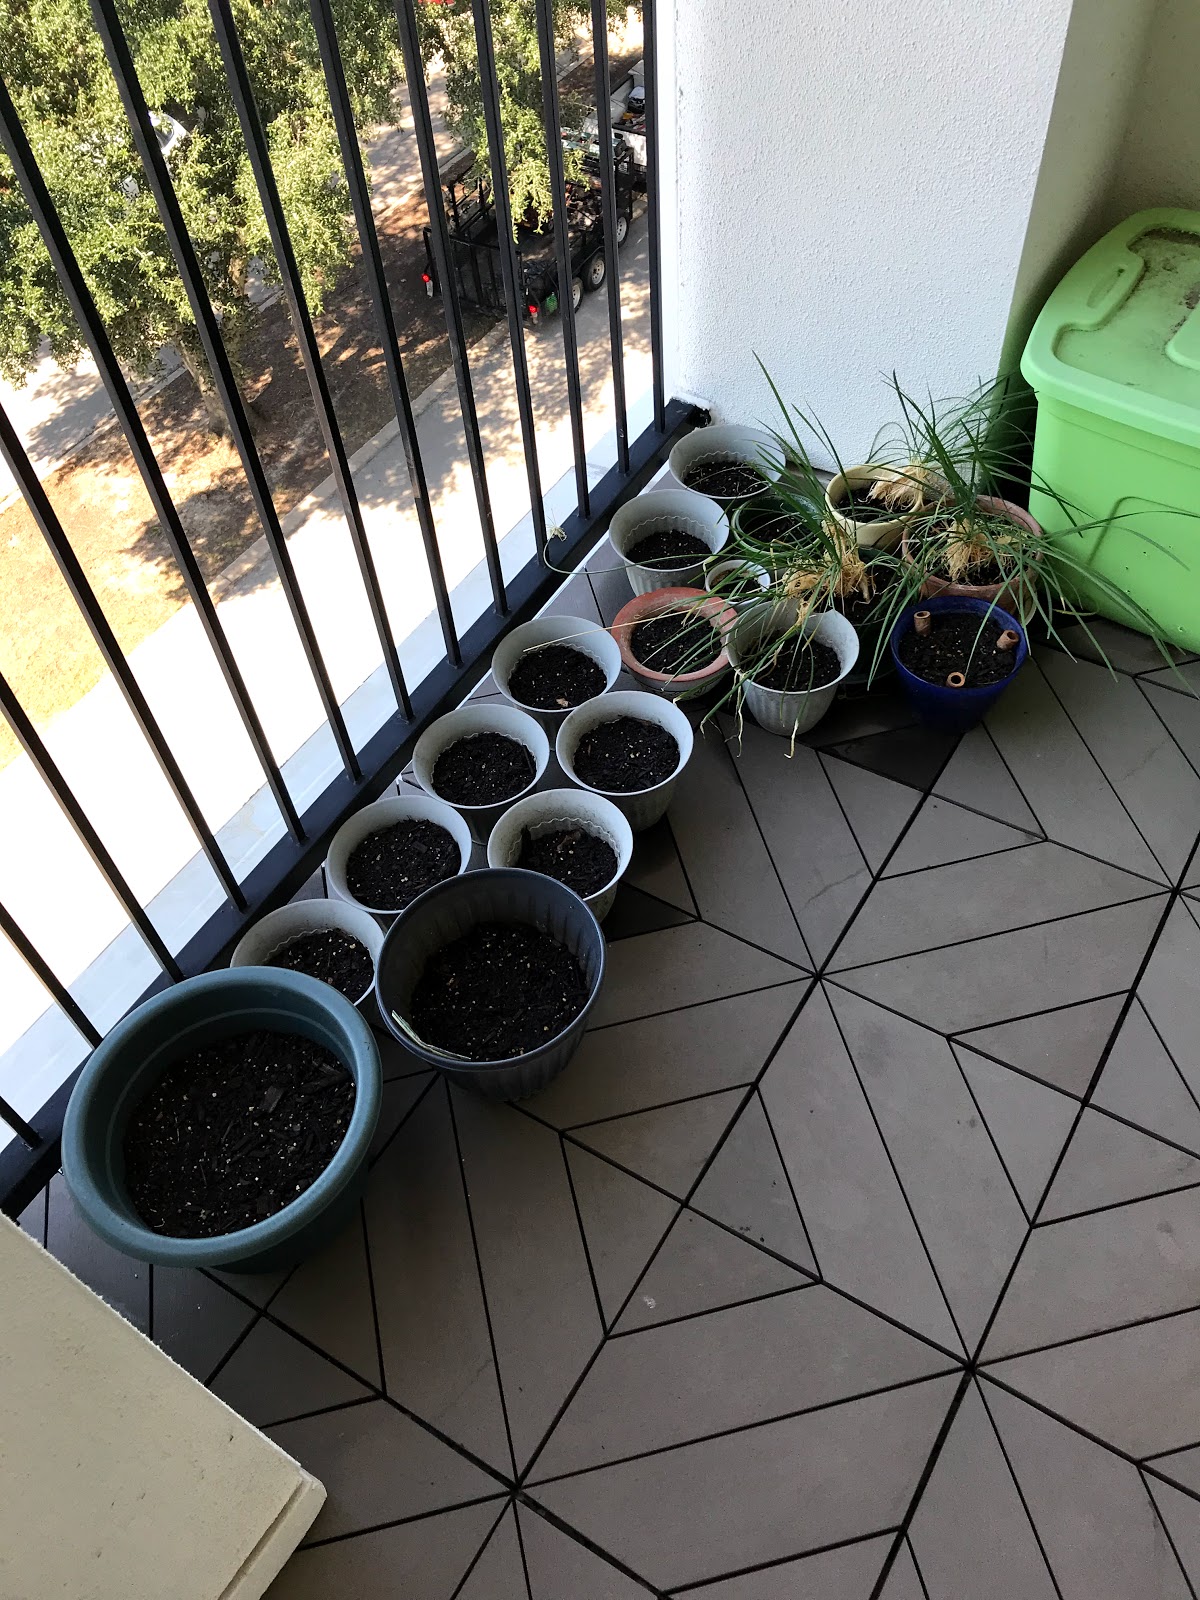
I am concluding that I need to find a way to use my phone or iPad to post, because otherwise I just don’t get around to it. I spent my morning today puttering about with my little fledgling balcony garden. I haven’t really given it proper care and attention, but even so I have achieved a few things. I had a few little starts of plants which I planted in some big pots by my front door. Some purple kale, a couple divisions of chives, and a couple shoots of ginger from kitchen leftovers. If these survive, I think they will fill in to make a pretty pot. Doesn’t look like much now, though. Then I went through and shifted a couple things from small pots to my big bin planters – some chives and onions, mostly. Cut back some bok choi that was completely gone to seed, and planted a few bush bean plants in that spot instead. I started some seeds in smaller pots that will sit on my kitchen windowsill. And put a few seeds into various empty spots in the planters. I will wait a bit to buy a few herbs to fill some of the gaps.


I probably had tasted this vegetable mixed into stir fries prior to this, but the first time I remember knowingly trying Bok Choi was one summer visiting my Granddaddy’s house. We came across it at the grocery store, and I mentioned I’d never tried it. My Dad said he liked it, and so Granddaddy said “let’s try some, then!” and threw a couple heads of it in the basket. Granddaddy was prone to buying a lot of anything he liked!
So I remember trying it raw and being very impressed with the mix of sweet, crisp, and mildly spicy. And once I knew what to recognize, I realized I liked it very much cooked into stir fries and such.
I later learned that the spelling is quite variable, which is not surprising as it comes from Asia where the languages don’t tend to use our characters. I’ve seen it spelled Bok/Pak/Pac Choy/Choi.
Food sites describe it as “nutrient rich and low calorie”, which seems valuable.
Plant family: Brassicas (Cool Season Cabbage family)
Cool season – can tolerate light frost, may actually improve flavor. Should be able to do spring and fall crops, though excess cold or heat can trigger early bolting.
Plants want moderate to full sun (6+hours per day) though part-shade may help prevent bolting in hot conditions.
Can be successfully grown in a hydroponic setup.
Wants rich soil (leafy plants want nitrogen) with very good drainage to prevent the fleshy stalks from rotting.
Plant seeds ¼ to ½ inch deep, thin to 7” or more. Seedings predicted to emerge at 10-21 days per seed packet. Per various websites, will germinate quicker than that, and “readily germinate”.
It may also be possible to get new plants by rooting the base of harvested plants (from store or previously harvested one?)
Recommended spacing of 7” or more. Sources recommend anything from 6-12 inches of soil depth with “rich, well-drained” soil. If growing for “baby” bok choi, can use 6-inch diameter pot.
Fertilize soil before planting with balanced fertilizer. If adding additional fertilizer, use nitrogen rich product to promote leaf growth.
Water to keep soil most but not soggy. Try to avoid watering leaves, if possible.
Should be ready for harvest in 45 days. Baby varieties within 30 days.
“Baby” bok choi is harvested when it is 5-6 inches tall.
Pull whole plants or cut outer leaves for cut-and-come-again harvesting. Once it bolts it will become bitter.
Flea beetles
Aphids, mites could be controlled with neem spray
Other cool season greens like lettuce, spinach, arugula, swiss chard, mustard, mesclun mixtures
Other brassicas like radishes, kale, broccoli, cauliflower, broccoli rabe Beets or carrots Herbs: Dill, Mint Flowers for pest control: Nasturtium, Marigolds may help control mites. Tatsoi and Mizuna – two other asian greens, tatsoi is like broccoli raab and mizuna is like mustard.
Bok Choi can be eaten raw in salads and slaws, If cooked the key is to cook quickly to retain texture and crispness. Stir fry alone or with other veggies. Can also roast it – whole heads at once.
https://www.wholefoodsmarket.com/blog/whole-story/enjoy-bok-choy
https://www.epicurious.com/ingredients/how-to-cook-bok-choy-raw-recipes-article
https://www.growveg.com/plants/us-and-canada/how-to-grow-bok-choy/ http://geekgardener.in/2011/06/20/growing-bok-choy-in-containers/ https://homeguides.sfgate.com/plant-baby-bok-choy-container-104840.html https://www.gardeningknowhow.com/edible/vegetables/bok-choy
Kale and Bok Choy and Oat grass for the cats (started day 3, more numerous now)
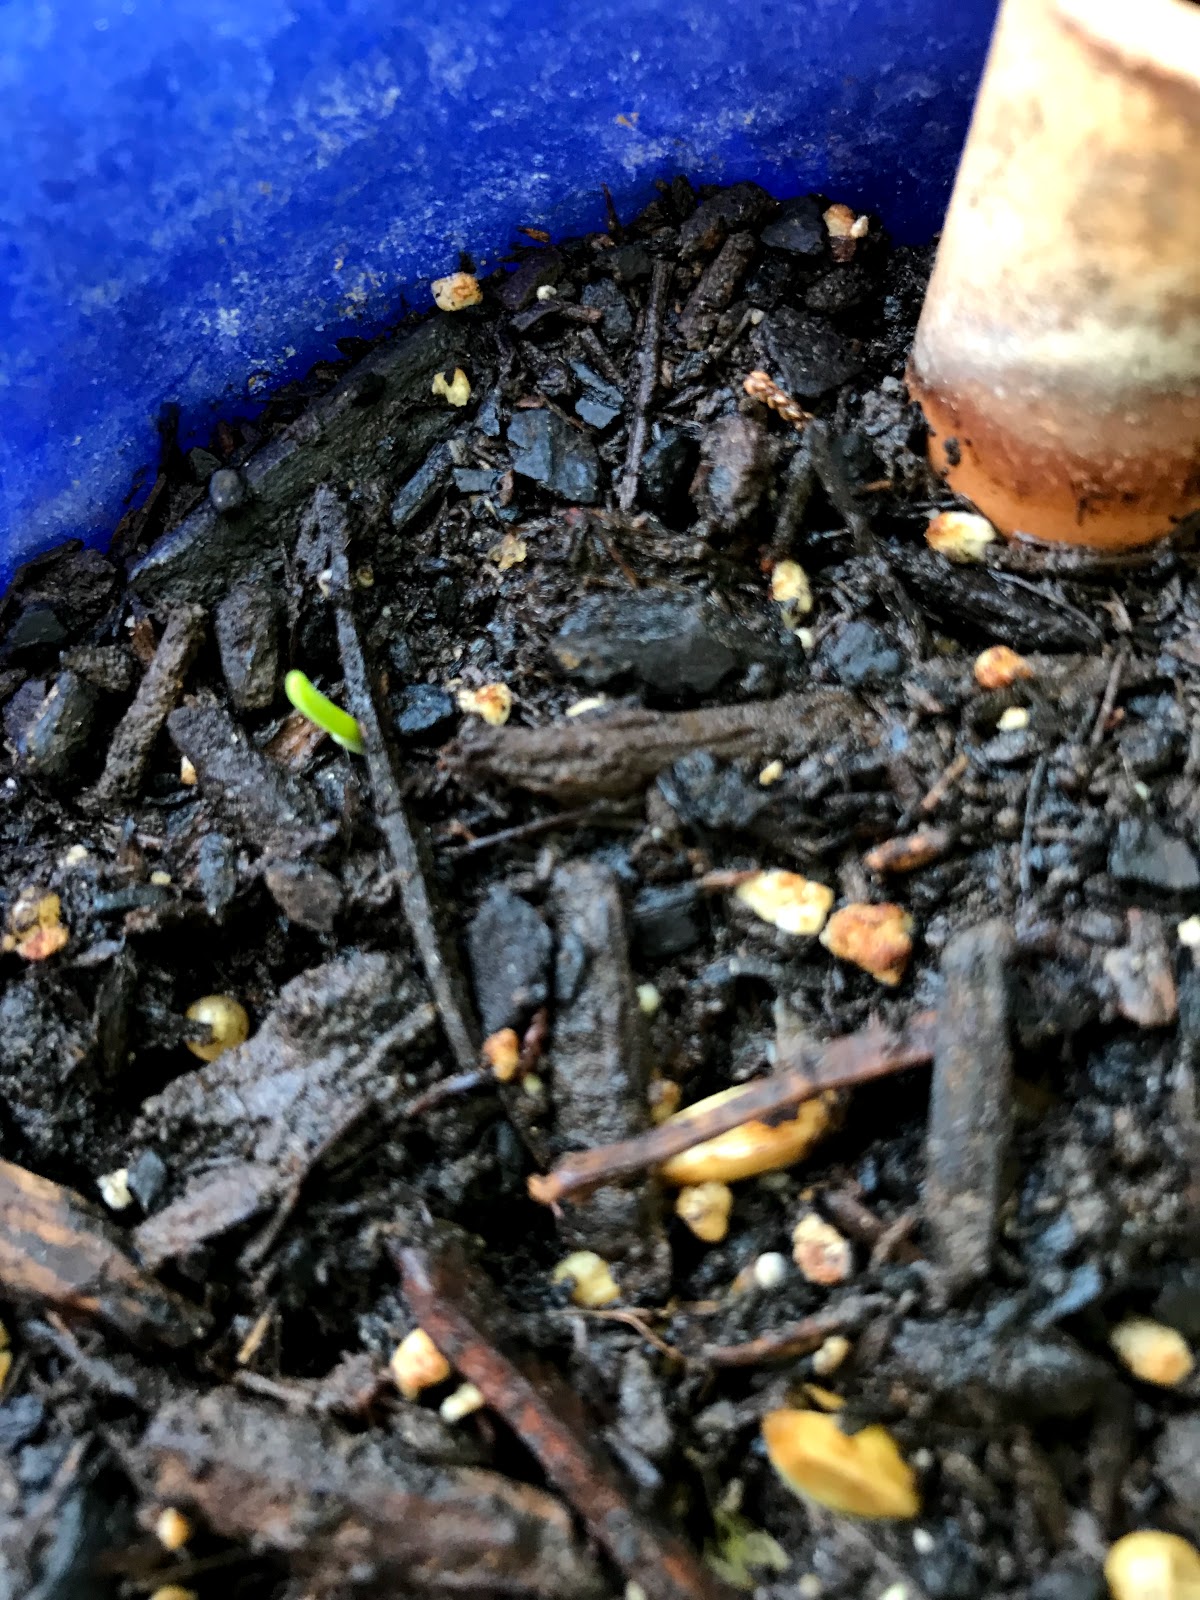
After three days, I see the first babies in the pot labelled Bok Choi! That’s pretty impressive for seeds that were marked to use before 2014. This is three days after planting, and already there’s signs of pretty high germination rate.
I’ll have to try to transplant them into separate pots, it’ll be interesting to see if they can survive the transplanting process. I’ll wait until they’re at least starting to develop second leaves.
Since it’s quite hot out still, I may move them back a bit on the patio so they’ll get less direct sun.

More experimenting with making a good dough for yummy comfort food.
So I had a couple of things going on here, to test. The first was to compare the store-bought dough available at my local HEB to my own dough, to see if I noticed any difference. The second was to try a couple different kinds of options – quick-bake pizza versus a wrapped style like Stromboli.
My dough recipe for this set of experiments was:
For the Stromboli, I sautéed a pound of sliced mushrooms. I also sautéed a box of frozen spinach with 3 tsp chopped garlic, a generous sprinkle of nutmeg, and a sprinkle of black pepper. Once it was fully hot I spooned it onto some paper towels to drain and cool. Before adding it to the Stromboli I squeezed it to get rid of as much water as possible.
I made two Stromboli – one from my own dough (half of the recipe above) and one from the commercial ball of dough.
Preheated the oven to 400. Rolled the dough out into a large square – about 10×12 inches, which made it a bit less than half-inch thick. I laid out a thin layer of provolone, leaving a bit of dough uncovered on sides and ends. on top of that I spread out the mushrooms and spinach. Rolled the thing up, pinched to seal the ends and edges, set it on parchment paper, slashed the top every couple of inches. Then baked it for 28 minutes on my hot pizza stone (just slide parchment paper onto and off of the stone).
Served with jarred marinara.
Result: The commercial dough came out better than the homemade. I think because the commercial one had slightly more volume? The homemade one seemed to take longer to cook and didn’t brown up as nicely. Also, these came out ENORMOUS. I cut one in half to feed both of us, and it was a large meal. So the other got left for another night and it wasn’t quite a good on re-heating. So in future – make only one at a time, or serve more people at once!
These were tasty and I should probably do them again sometime. 🙂
For the pizza, I divided the dough into two, rolled out each piece to about 1/2 inch thick, let it rise on a piece of parchment paper while the oven with a stone in it rose to 450. Then slid the parchment paper onto the stone, baked for 10 minutes, removed and added pizza sauce (Classico), mozzarella, and pepperoni. Slid back into the hot oven for another 5 minutes.
These were fine. I think I used too much sauce, so they were kind of messy.
The pizza dough recipe above comes out a little bland.
Conclusion:
I’m not at all sure that the extra effort to make my own dough is worth the result in flavor. The commercial stuff tasted just fine, wasn’t real expensive, and was easy to use.
This is adapted from this recipe – I thought that the idea of thickening the chili with pumpkin had potential.
Ingredients
2 pounds ground turkey
1 lb dried large red kidney beans
2 – 14 oz cans pumpkin puree
3 – 14 oz cans crushed or diced tomatoes
4 cups water
1.5 cups frozen chopped onion
1 cup frozen green bell peppers
2 cloves garlic, diced – large spoonful of pre-diced
3 teaspoons cumin
3 tablespoon chili powder – to be honest, I just dump it in, it’s probably more than that.
2 teaspoons dried oregano
This was a combination of several different recipes.
2.7 lb beef flank steak
salt and pepper
1 cup frozen chopped onion
4-5 cloves garlic
1 cup beef broth
1 can diced tomatoes
2 cups frozen bell peppers (the ones Keith got were all green peppers)
1/2 tsp oregano
1 tsp cumin
1 bay leaf
1/4 cup parsley flakes
2 tbsp white vinegar
Season meat with salt and pepper
Preheat instant pot on saute mode, then sear steak on all sides and set aside.
add onions and garlic, cook until soft.
Add broth to deglaze
Add tomatoes, peppers, oregano, cumin, bay, then put meat back in
pressure cook on high for 40 minutes
10 minutes natural release
remove meat to plate, shred with forks.
blend sauce with immersion blender
mix in parsley and vinegar.
Result: Flavor was nice. I would’ve preferred to have the mix of red, yellow, and green bell peppers instead of just green. there was way too much liquid in the pot. Next time, I think I can skip the beef broth and just go with the liquid from the can of tomatoes and that released from the onion, peppers, and meat.
1 lb dry black beans
3 cups water
1/2 cup chopped onion
2 cloves garlic
1/2 tsp cumin
1 tsp salt
2 bay leaves
2 tsp Worcestershire
Add all ingredients to pot and pressure cook 22 minutes
natural release at least 10 minutes
blend or mash a bit to thicken juice
Results: Nice. A bit bland. Consider cooking in broth instead of water. Or adding a bit more seasoning – oregano, maybe? There wasn’t a ton of liquid, I prefer a bit more to soak down and flavor the rice. Maybe would add an additional 1/4 to 1/2 cup water next time.
Brown rice – 2 cups rice to 2.5 cups water, add a spoonful of bacon fat for flavor, pressure 23 minutes on high.
